There are multiple steps in making your bionic finger! Before you begin, collect all the components. Click here to see them.
1. Gather your components for your finger, and lay them out on your desk.
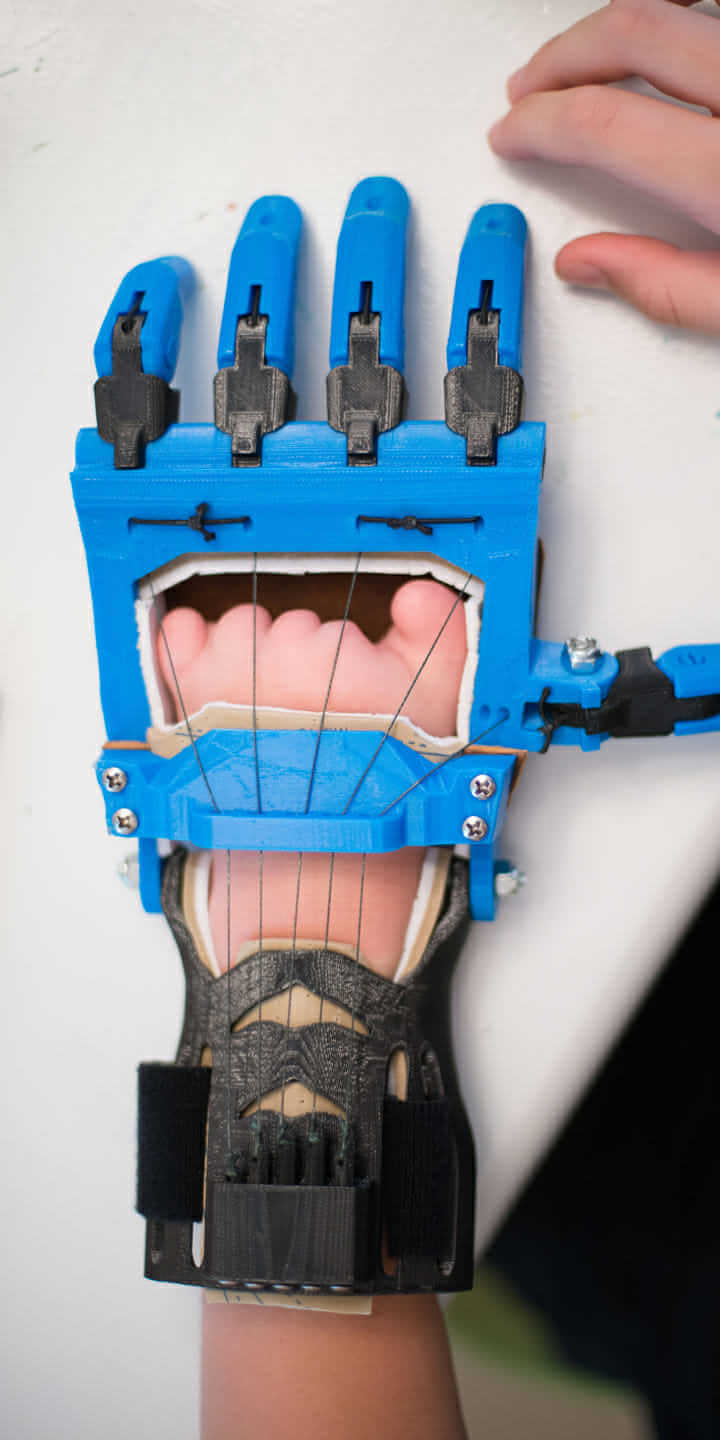
2. Double over your plastic sheet and cut two strips that are 2.5cm long, and 1cm wide. Hot glue them into the cut-ins in the finger to join the two joints. Ignore this step if you are using a straw finger.
3. Thread your fishing wire through the finger joints and up through the top hole. Thread it back down through the second hole so that 2cm of wire. Hot glue the wire where it comes out of the hole.
4. Hot glue your finger onto your wood so that it bends towards you. Only 2cm of your finger should be attached to the board.
5. Tie the end of your wire to the microservo, and mark with a sharpie about 1/3 down your board. Glue your microservo so that it removes most of the slack from your finger, but still allows the finger to return to a straight position.
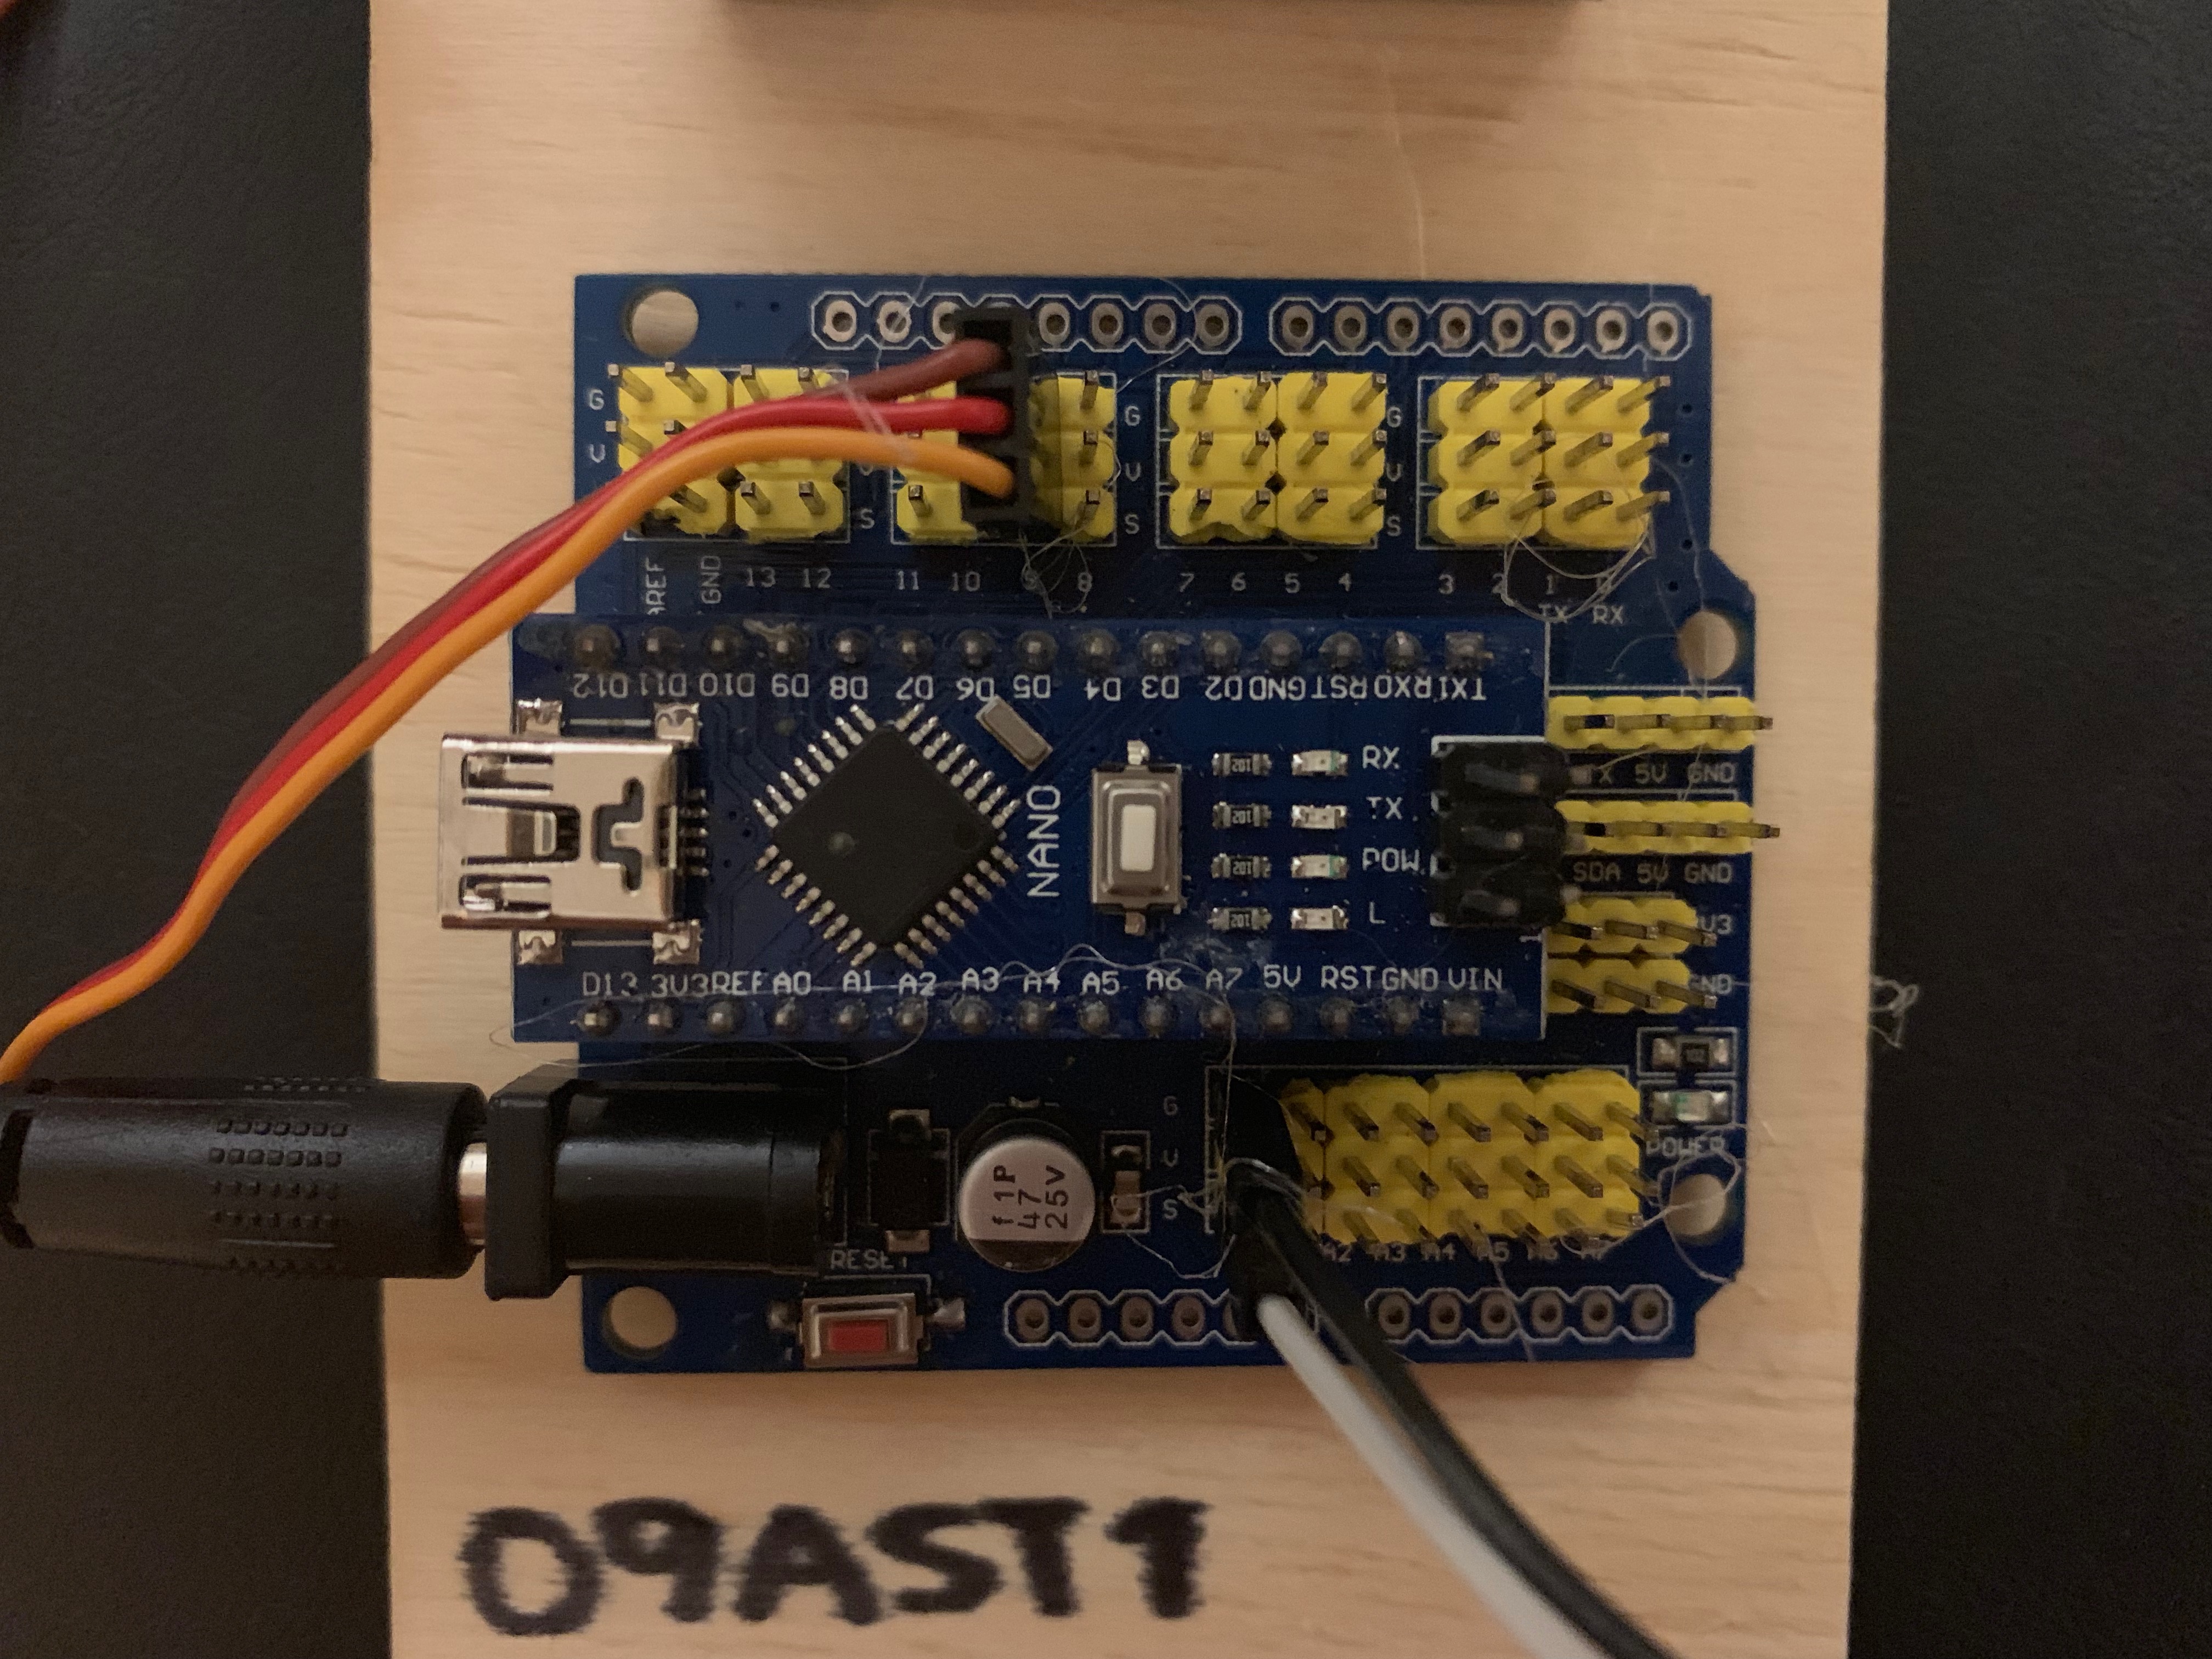
6. Attach the wires from the microservo to the digital pins on your Arduino. The LED pin will change depending on your code, but the brown wire always attaches to G, the yellow wire to S, and the red wire to V.
7. Attach the wire from the flex sensor to the analog pins on your Arduino. Again the number will change depending on what number is in your code. The colours don't matter this time, they just have to be attached to the G and S.
8. Attach your USB cord to your laptop and your arduino, and follow the coding instructions. Click here to find them.
9. Once you have coded and calibrated your finger, glue your flex sensor to the inside of the index finger of your glove.
10. Once you are confident with the calibration and workings of your finger, glue the rest of the components to your board.
11. Congratulations! You have finished your own bionic finger!